Thursday, December 12, 2013

A Woodworking Project Start to Finish-End Grain Cutting Board Part 1

Hello All!!

Woodworking is a project that takes a lot of time and patience. Just like if we were to build a house; we have to take the time to design, plan, create plans on paper, buy materials, build, finish and so on. When we receive an order for D & K Custom Woodworking, we take about a day to get the design sometimes longer for more complicated pieces. This is where we get your idea on paper. Down to the last final measurement. From there we are able to build a set of plans, which allows us to create a supply list, then we can provide an estimate cost for the finished piece. From there we do the shopping for the materials and start creating.

Supplies Needed:
Choice of Hardwood
Wood Glue (We recommend Titebond II)
Table Saw
Tape Measure
Bar Clamps
Clamps
Cauls
Planer
Sander with 80 and 120 grit sandpaper
Chisel and/or Scraper
Hearing and Eye Protection

This week's project is an end grain cutting board.We ordered a kit of Purple Heart and Hard Maple from Bell Forest Products. There are other kinds of hardwoods that can be used. However it is important to make sure that they have a tight grain, and have less natural oils.

Hardwoods are used to make cutting boards because they don't allow as much bacterial growth as a soft wood (like Pine) would. The difference between hard and soft woods are the grain patterns. A hard wood's grain pattern is very tight and close together creating dense, heavy wood. This comes from a slow growing tree, which usually has leaves, like Maple. A soft wood's grain pattern is loose and spread out, which creates a lighter, less dense wood. Soft wood comes from a faster growing tree, that usually has needles; like Pine. The hardwood's tight end grain pattern helps diminish bacterial growth in the wood, which is great for a cutting board. Now you may ask why we are using the end grain side for the surface to cut on, instead of the face grain or edge grain.  Imagine your piece of wood to have the structure of the bristles of a paint brush. The bristles of the brush represent the grains of the wood. If you lay the brush horizontal, think about how that would look if you were take a knife to that. There is a chance to tear up the wood, the knife, and it leaves major cut marks. If you look at the top of the brush and the ends of the bristles, this would compare to the end grain. If you take your knife to that, it instead separates the grains. This allows less wear and tear to the knife, and on the board itself. 

Now that we have the wood it was time to design the cutting board. We could have done white and purple stripes, but we opt out of the simple idea and wanted to go towards more of a checkerboard pattern.  We used the Cutting Board Designer software that is available from 1024Studios.com The software allows you to create a design. Then does all of the math for you and provides a cut list and instructions for your design!

Before we can start cutting the necessary pieces for our cutting board we need to clean up the factory cut edges. This will ensure we have square edges to worth with. Once we have those done we can start cutting our pieces for the first panel. 


The Cutting Board Designer's instructions said that we needed 8 strips. 4 of Maple and 4 Purple heart. They all need to be 26 1/2 inches long and 1 1/4 inches thick. 2 strips need to be 2 1/4 inches wide, 2 need to be 1 3/4 inches wide, 2 need to be 1 1/4 inches wide and 2 need to be 3/4 of an inch wide.  


Once all of those are cut, it is time to glue the pieces together. We start by laying out our panel the way that the instructions state on top of the bar clamps. It is important to glue the pieces together the exact way the instructions say to ensure that your design can be created. 


The gluing process is the most important step of making the cutting board. Glue is the ONLY thing that is holding the joints together. So be generous. It is also important to use a WATERPROOF and WEATHER RESISTANT wood glue. We always use Titebond II.


When we have glue on all of the surfaces that needs it, we made sure the edges were straight and started tightening the bar clamps to bring the boards tightly together. For this project we needed to use our homemade cauls again. Cauls keep the pieces that are being glued together flat. All we need to make the cauls are some scrap wood and packing tape. Clamp the cauls together to make the cutting board flat. Check for any gaps between the boards. If so add more clamps as necessary. 


Glue squeeze out is a good thing to have. This is how we know that all of the surfaces have glue. After about a half hour we went back and scraped off the drying glue. This saves a lot of time when it comes time to sand the glue off. 

Now let the glue set up and dry. 

Once the glue is dry, remove the clamps. Scrape any left over chunks of dried glue. We alternated between using a chisel and a paint scraper. After the major amount of glue is removed by scraping use a sander with 80 grit sand paper to remove the rest. 


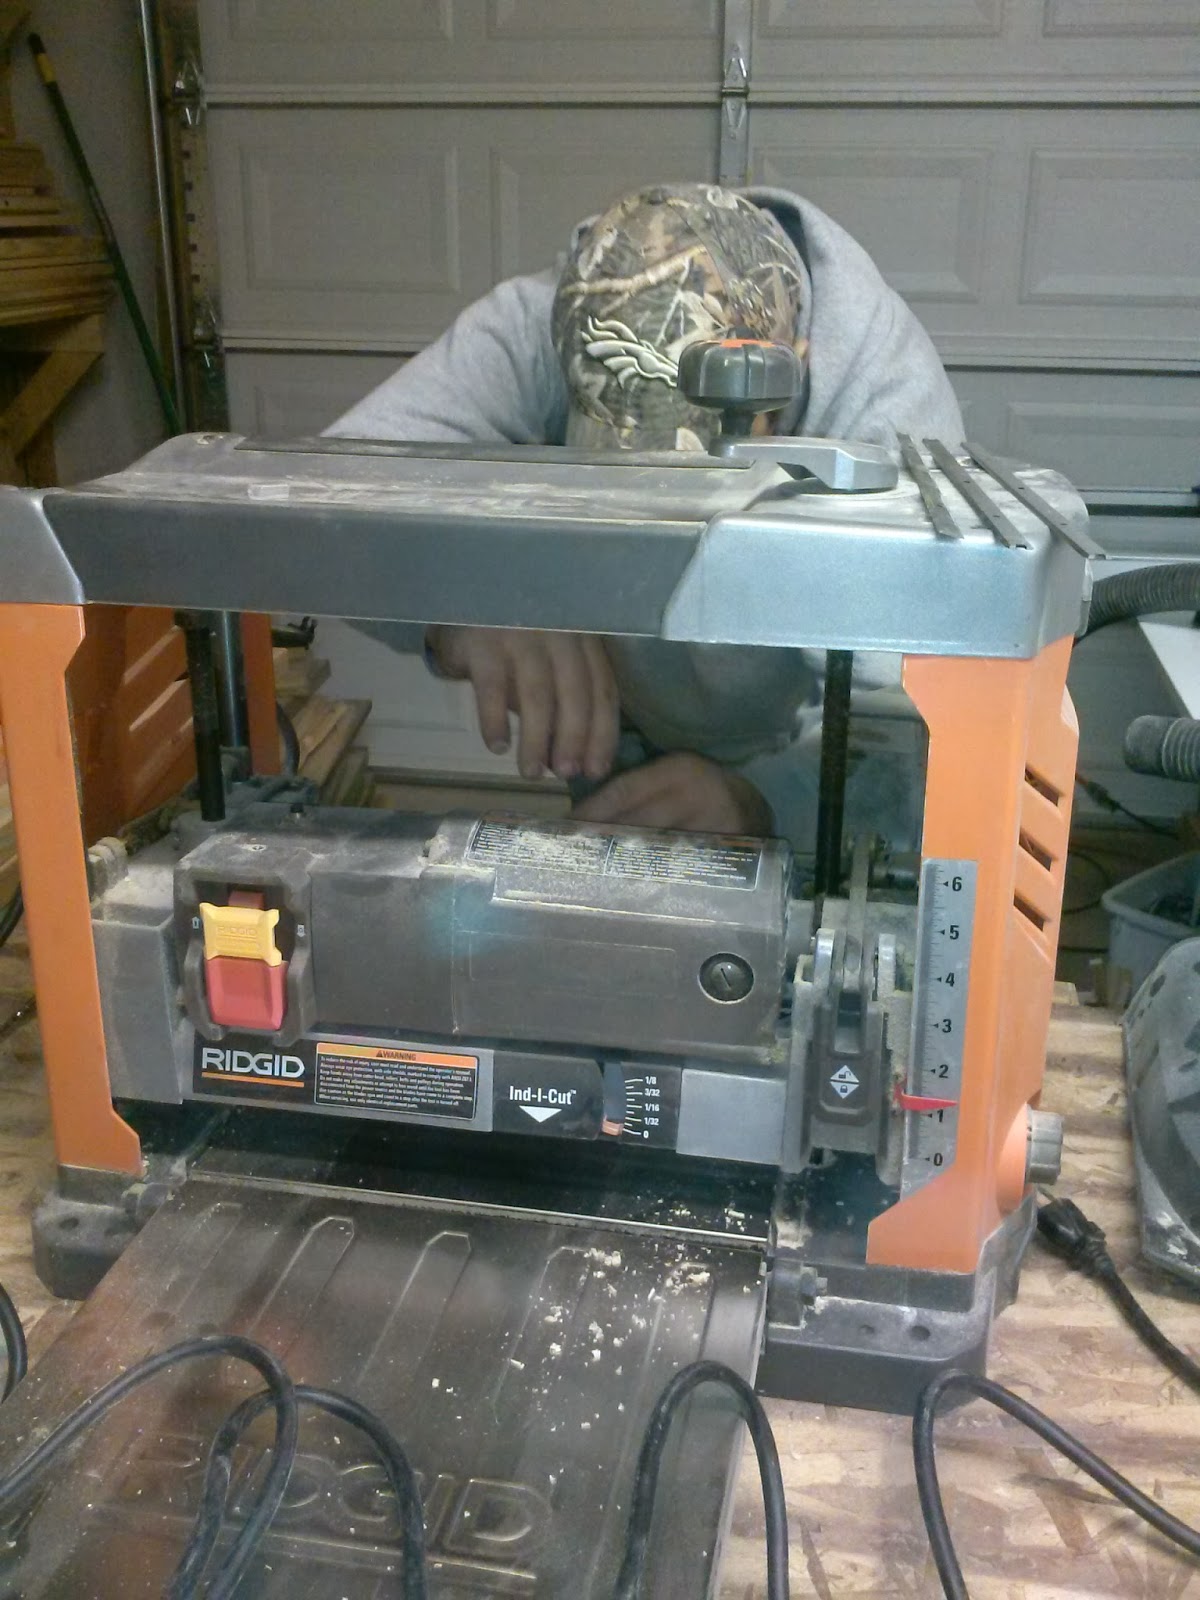
The next step is to run the panel through the planer. This will remove any excess glue, and any places that are not level. Our goal thickness was 1 5/8 inch. After that thickness was achieved, we sanded the panel again.


After sanding it is time to cut the board into the strips that will create our checkerboard pattern. Start by squaring an edge perpendicular to the stripes. Use that edge to run on the fence of the table saw. For our pattern needed to make our strips 1 1/4 inches thick. This thickness will turn out to be how tall the cutting board is. Every strip that is cut off set aside and lay the strip back out in the same direction. Do this for all of your strips.


Once all pieces are cut, flip over every strip so the end grain is on top. This is where you follow this instruction from your Cutting Board Designer. For our cutting board we needed to flip every other strip. As you can see, this is when our pattern started to take shape. 


Take your strips and place them back in the bar clamps. Glue and clamp your strips together. REMINDER-When gluing at this point remember that the end grain is up. You are gluing the face grain sides. Take time to make sure all of the ends strips line up, otherwise your pattern will be not be straight.


Since all of the strips were the same thickness, we didn't need to use cauls to flatten the cutting board. Instead, to ensure that we had straight edges we clamped them to the sides. Tighten the clamps til you have a good glue squeeze out and let the glue set up for about half an hour and go back and scrape of the excess glue. Then let the glue finish drying. 


This completes the construction of the cutting board! It's exciting to see how it took shape! Next is to add some hand holds and apply a finish to it; which I will explain in Part 2! 

Enjoy!

Kirstie

Want your own custom end grain cutting board? This cutting board can be made to order from  D & K Custom Woodworking LLC


Tuesday, December 10, 2013

New Project This Week!!

Hello all!


We are getting ready to start our next wood working project! We finally got some Hard Maple, and some Purple Heart in and we are excited to use this in making a very unique cutting board. This next tutorial is going to be a basic woodworking project from start to finish. Basically we are going to explain the process we go through when we receive an order for a custom piece. I am very excited for this one!!!

Enjoy!

Kirstie
Purple Heart and Hard Maple

Friday, December 6, 2013

Website Updated!

Hey All!

Since we have been dealing with the cold weather the last few days, we decided not to work in the shop. So we ended up getting the office reorganized and best of all updated our website! New and approved, even have some adds from affiliates! Please go check in out and look around! :) www.dandkcustomwoodworking.com

Enjoy!
Kirstie

Thursday, December 5, 2013

Fridgid Morning

Hey all!
Good Morning!
It is a whole 3 degrees out right now, it is so cold that my furnace can't even keep up! It will not raise the heat over 64 degrees in my house. Who knows what it is out in the workshop!I am too scared to go check! Oh the joys of living in Colorado! Well, it looks like a day of baking and maybe I can warm the up the kitchen. What do you say? Maybe a good day to get my recipe page going?!

Warm Wishes!
Kirstie


Wednesday, December 4, 2013

Thanksgiving Table


We have been wanting to make our own dining room table for awhile now. When we first had the idea we were living in Washington, getting ready to move back to Colorado. So I said to hold off until after our move. Well, then we had to be in an apartment for a few months, so we didn't have the room for a big table. Now though, we are in a house that has room for our dream table! We had family coming over for Thanksgiving so we needed a bigger table!

We decided on a Farmhouse style table made out of 2x4's, 2x6's, 2x8's and 4x4's. And out of Redwood. I have always liked the look of Redwood, and the only other choice we had available at our local lumber yard was White Wood (Douglas Fir).

We found this 4X4 Truss Beam Table and plans from www.ana-white.com We ended up having to change it a bit because we couldn't find 2x10x8 of the Redwood. (This is where you can find a supplies list also. I forgot to steal the shopping list away from the hubby.)


4X4 Truss Beam Table
ana-white.com


Tools Needed:
Tape Measure
Table Saw
Miter Saw
Router with Round Over Bit
Clamps
Calls
Wood Glue
Belt Sander
Orbital Sander
Sand Paper 80,120, and 320 grit
Planer
Scraper
Circular Saw
T-Square
Kreg Jig
Drill
Air Compressor
Paint Sprayer for Stain and Polyurethane (Optional)
Brushes/Rags  
Ear and Eye Protection -Some of these tools get LOUD!


After getting our supplies we were able to get started!!

First we rough cut the tabletop pieces to length. No need to get perfect they will be trimmed down later.


We used a miter saw to cut our needed pieces.


While we were at it, we cut the rest of the pieces to assemble the table.


We then ran the tabletop pieces through the planer to get them all the same thickness, which also allowed to take off any impurities. 


Time to change the blades!


After they were all the same thickness, we ran the edges through the table saw. This allows a nice clean square edge to be able to glue together. When you buy lumber from a lumber yard, most of the time the corners are a bit rounded. This makes it hard to have a tight seam. Instead of have one continuous flat surface you will have gaps at the seams. You can also use a jointer for this process.


Now it is time to glue and clamp it up!! This is super easy. Glue all of the necessary edges and lay them down inside of the bar clamps. To the make the table top flat across you will need to take some scrap boards, and put packing tape on them, at least the width of the table. These are called calls. We used 3 sets of 2. Place the taped sides towards the glued wood. The slickness of the tape won't allowed the glue to "stick" to the calls.


Clamp the calls down. This will bring everything flat. If there are some high parts in the seams its okay. We will sand them down later. Now, let the glue set up for several hours. Do to the cool/moist weather we let it set up for a good 18 hours.


After the glue had set we then took all of the clamps and calls off and scraped all of the glue squeeze out off. We took the belt sander with 80 grit sandpaper to get the remaining glue off and level the high spots out. We then followed with our orbital sander with 100 grit paper to smooth it up. Make sure to sand both sides. 


Since we only rough cut the boards to length we then went back and cut the table to its final length using a circular saw. To make sure we had a straight level line across we used a T square to get our line. Then measure the width of one side of the base of your saw to the edge of the blade. Then measure from your existing mark over that measurement. Put a guide board on that line and clamp it down. This will ensure that your saw is cutting in a straight path along your line.


Now time for the bread boards. The width of your table will be the length of the breadboard, which we used a 2X8. The bread board covers up the end grain and completes the look of the table. These were planed down with the tabletops boards so they were all the same thickness. 


We  attached the bread board to the ends of the table by pocket hole screws. This is where a Kreg Jig comes in very handy.  We did one per board. Then screw in your pocket hole screws. 


Sand down the bread boards and make them flush with the others. Keep it mind you are working on the bottom of the table top.


After sanding, we used a 1/4 inch round over bit in our router to round over the bottom edges. Then we flipped the tabletop over and used a 1/2 inch round over bit for the top.


After one more fine sanding it was time to stain! Since we used Redwood we wanted to keep the natural beauty, just enhance it. So we used a natural colored stain. After it was dry we took it out and sprayed a couple of coats of clear satin polyurethane on. With 320 grit hand sanding between each coat. After those were dry we did one more coat by hand. 


Now onto the base of the table. No table top is good without a strong, sturdy base! For the 4x4 Truss base we started by planing all of our Redwood 4X4's to make sure the rounded corners were off, and that they were square. Again, this allows us to remove any impurities in the wood.


Then we cut them to the lengths we needed. Note- we rough cut these when we rough cut the rest of the boards at the beginning. At this time these are cut to final length.


Using the plans we made the two end pieces.


Then we built the middle. We then attached the 3 pieces together 4 inch screws and wood glue. 


This is a good example why we plane down our boards to make them square. As you can see the one the round over wasn't quite off so there is a good sized gap on the edges of the seam. The other picture shows a squared board. As you can see the seam is nice and tight. 


After a coat of stain and polyurethane to the base it was time to put the table together!
 

We started  by putting the pieces for the base together. Attach your 2 2X4's across the top using 2 1/2 inch pocket hole screws. NO GLUE. Then bring your middle truss piece to the middle. The reason why we attached the 2x4's first was to bring the base to it's final length. (And they are a lot easier to handle than the middle section). Then find the middle of the two end pieces, and each 4X4 end of the middle piece. Line up your marks and it will be centered. Attach the middle piece to the end pieces using 4 1/2 inch log screws. Again, no glue. The reason why we didn't use glue one these joints was so we can disassemble if need be.


Then put the table top on. Make sure the hangovers on the width and the length are the same to the table is centered on the base. Screw it on from the bottom using 4 inch wood screws.


Enjoy!
Kirstie

Want your own custom made table? These are available to be made to order from D & K Custom Woodworking LLC
www.dankcustomwoodworking.com